Time: 30 minutes to 1 hour
Skill level: Intermediate
Installing a vessel sink
Although slightly more technical than a built-in sink, these steps will help you to easily install a vessel sink.
Installation guide
You will need

Hole saw with Ø 1.4 and Ø 1 ¾ bits
Silicone gun

Spanner

Screwdriver

Tape measure

Pencil

Carpenter's square


Step 1
Measure to perfectly position the sink and faucet
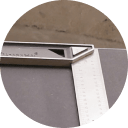
Using a carpenter's square, measuring tape, and pencil, marks the position of the sink and faucet. Place the sink on the markings to ensure alignment. Once it's in place, use the hole in the sink to mark the exact location where the cut will be made for the drain. Repeat the same operation, this time with the faucet, checking its position relative to the sink. Pay attention to the bottom crosspiece for the water inlets to ensure proper clearance for the water inlets beneath. Once everything is aligned, mark the position of the faucet with a wooden pencil.

Step 2
Drill the holes
Once you've confirmed positioning, drill a 1 ¾-inch hole for the sink and a 1.4-inch hole for the faucet using a hole saw. Ensure the drill is perpendicular for clean cuts.
Step 3
Install the sink
Apply a silicone seal underneath the sink to help secure, then position it on the top. Once aligned correctly, press down firmly.
Step 4
Install the faucet
Install the faucet, siphon, and drain. Then connect the faucet to the water supply and the siphon to the drain. That's it!
Installation guide
Time: 30 minutes to 1 hour
Skill level: Intermediate
Installing a vessel sink
Although it's a little more technical than a built-in basin, these steps will help you to easily install a vessel sink.
You will need

Hole saw with Ø 1.4 and Ø 1 ¾ bits
Silicone gun, spanner (tool)

Spanner

Screwdriver

Tape measure

Pencil

Carpenter's square


Step 1
Measure to perfectly position the sink and faucet
Using a carpenter's square, a measuring tape and a pencil, make the marks you will use to position the sink and faucet. Then place the sink on the markings to check that it is in the right position. Use the hole in the sink to position the final mark where the cut will be made. Repeat the same operation, this time with the faucet. Check its position in relation to the basin and draw around it. Position the taps to ensure that everything passes through: pay attention to the bottom crosspiece for the water inlets! Next, mark the position of the faucet with a wooden pencil.

Step 2
Drill the holes
Once you've confirmed all the positioning, use a hole saw to drill a hole in the top, perpendicular to the water drain, you need a 1 ¾ inches for the sink and 1.4 inches for the faucet.
Step 3
Install the sink
Apply a silicone seal under the sink to fix it more easily, then position it on the top. Once correctly positioned, apply pressure.
Step 4
Install the faucet
Once the faucet, siphon and drain have been installed, connect the tap to the water supply and the siphon to the drain. That's it!


